The new game has been out for a while. I figure there's no harm in sharing my specially tweaked personal setup for running 205+ at Talladega in qualifying, and pulling almost everyone on the straights. I engaged in some obsessive testing for this, so I can only vouch for it on a PS3 where you are willing to engage in some specific on-track tricks and tactics to go for the win at Talladega.
I have to warn you. This setup is specifically honed to my own driving style, and there are some finicky drawbacks you'll have to handle. It drags at first, especially if you do a qualifying session. It can be loose in the draft, so I recommend letting off before you bump anyone else, and running high in the corners until you're at least 2-3 laps in. Attempts to clip the aprons must be straight shots. Your car will want to push through whoever you bump draft. If you get caught in a drag race down the straights, you're likely to win, because the specific tweaks are designed to enable you to let off the corners if need be, so you'll have to plan your drafting strategy around that. If you do a lazy swerve down the backstretch, you're likely to pick up good MPH or two.
TIRES:
Front Left:
Cold Pressure: 35
Camber: 8
Caster: 6
Front Right:
Cold Pressure: 65
Camber: -8
Caster: 6
Rear Left:
Pressure: 35
Camber: 1.8
Rear Right:
Pressure: 65
Camber: -1.8
Front Toe-In: -1/4
Left Rear Toe In: -1/4
Right Rear Toe In: 1/16
SUSPENSION:
Front Left:
Ride Height: 10.0
Bump: 71
Rebound: 40
Spring: 350
Front Right:
Ride Height: 10.0
Bump: 71
Rebound: 19
Spring: 350
Rear Left:
Ride Height: 5.5
Bump: 69
Rebound: 14
Spring: 460
Trackbar: 4.7
Rubber: YES
Rear Right:
Ride Height: 5.6
Bump: 69
Rebound: 14
Spring: 650
Track Bar: 4.7
Rubber: YES
DRIVETRAIN AND AERO:
Gearing: Cog B
Brake Bias: 59
Steering Lock: 14
AERO:
Tape: 100%
Front Splitter: 2.0
Front Bias: 52.5
Left Bias: 52
Wedge: Whatever it says (Should be around 49.3)
FRONT & REAR SWAY BAR:
Front: 850
Rear: 400
-------------------------------------
Personally, I used this setup to rim ride in the top lane over the course of many races. Most people can't hang with you up there if you're the leader, and you can always cut down when you need to. Have fun out there.
Showing posts with label Talladega Setup. Show all posts
Showing posts with label Talladega Setup. Show all posts

Alternate Patched Talladega Setup - 202 to 203 MPH - NASCAR The Game: Inside Line
Notes:
-You've read my 3-part tutorial that explains the basics of NTG:IL Talladega Setups, right?
-If you haven't downloaded the patch yet, check out my 199 to 200 MPH Talladega Setup for that version of the game.
-If you have downloaded the patch, you've read how this is a preliminary attempt to strike a balance between raising the front ride height and how the car will want to bottom out, and now know how to adjust it to your liking, right?
-If this setup is too slow for you, I have an alternate NTGIL Talladega Setup for the patched game here. Beware, it's even more loose than this one.
This Talladega setup will bottom out and be loose. I race on the PS3 with a controller. If you have a wheel, reduce your steering lock.
Front Left:
Cold Pressure: 35
Camber: 8
Caster: 6
Front Right:
Cold Pressure: 65
Camber: -8
Caster: 6
Rear Left:
Pressure: 35
Camber: 1.8
Rear Right:
Pressure: 65
Camber: -1.8
Front Toe-In: -1/4
Left Rear Toe In: -1/4
Right Rear Toe In: 1/16
Suspension:
Front Left:
Ride Height: 10.0
Bump: 55
Rebound: 40
Spring: 350
Front Right:
Ride Height: 10.0
Bump: 71
Rebound: 19
Spring: 380
Rear Left:
Ride Height: 5.5
Bump: 69
Rebound: 14
Spring: 460
Trackbar: 4.7
Rubber: NO
Rear Right:
Ride Height: 5.6
Bump: 69
Rebound: 14
Spring: 620
Track Bar: 4.7
Rubber: NO
Drivetrain and Aero:
Gearing: Cog B
Brake Bias: 59
Steering Lock: 14
Aero
Tape: 100%
Front Splitter: 2.0
Front Bias: 50
Left Bias: 52
Wedge: Whatever it says
Front & Rear Sway Bar:
Front: 800
Rear: 500
-You've read my 3-part tutorial that explains the basics of NTG:IL Talladega Setups, right?
-If you haven't downloaded the patch yet, check out my 199 to 200 MPH Talladega Setup for that version of the game.
-If you have downloaded the patch, you've read how this is a preliminary attempt to strike a balance between raising the front ride height and how the car will want to bottom out, and now know how to adjust it to your liking, right?
-If this setup is too slow for you, I have an alternate NTGIL Talladega Setup for the patched game here. Beware, it's even more loose than this one.
This Talladega setup will bottom out and be loose. I race on the PS3 with a controller. If you have a wheel, reduce your steering lock.
Front Left:
Cold Pressure: 35
Camber: 8
Caster: 6
Front Right:
Cold Pressure: 65
Camber: -8
Caster: 6
Rear Left:
Pressure: 35
Camber: 1.8
Rear Right:
Pressure: 65
Camber: -1.8
Front Toe-In: -1/4
Left Rear Toe In: -1/4
Right Rear Toe In: 1/16
Suspension:
Front Left:
Ride Height: 10.0
Bump: 55
Rebound: 40
Spring: 350
Front Right:
Ride Height: 10.0
Bump: 71
Rebound: 19
Spring: 380
Rear Left:
Ride Height: 5.5
Bump: 69
Rebound: 14
Spring: 460
Trackbar: 4.7
Rubber: NO
Rear Right:
Ride Height: 5.6
Bump: 69
Rebound: 14
Spring: 620
Track Bar: 4.7
Rubber: NO
Drivetrain and Aero:
Gearing: Cog B
Brake Bias: 59
Steering Lock: 14
Aero
Tape: 100%
Front Splitter: 2.0
Front Bias: 50
Left Bias: 52
Wedge: Whatever it says
Front & Rear Sway Bar:
Front: 800
Rear: 500
Patched Talladega Setup - NASCAR The Game: Inside Line
Notes:
-You've read my 3-part tutorial that explains the basics of NTG:IL Talladega Setups, right?
-If you haven't downloaded the patch yet, check out my 199 to 200 MPH Talladega Setup for that version of the game.
-If you have downloaded the patch, you've read how this is a preliminary attempt to strike a balance between raising the front ride height and how the car will want to bottom out, and now know how to adjust it to your liking, right?
This Talladega setup will bottom out and be loose. I race on the PS3 with a controller. If you have a wheel, reduce your steering lock.
Front Left:
Cold Pressure: 35
Camber: 8
Caster: 6
Front Right:
Cold Pressure: 65
Camber: -8
Caster: 6
Rear Left:
Pressure: 35
Camber: 1.8
Rear Right:
Pressure: 65
Camber: -1.8
Front Toe-In: -1/4
Left Rear Toe In: -1/4
Right Rear Toe In: 1/16
Suspension:
Front Left:
Ride Height: 10.0
Bump: 71
Rebound: 40
Spring: 350
Front Right:
Ride Height: 10.0
Bump: 71
Rebound: 19
Spring: 350
Rear Left:
Ride Height: 5.5
Bump: 69
Rebound: 14
Spring: 460
Trackbar: 4.7
Rubber: YES
Rear Right:
Ride Height: 5.6
Bump: 69
Rebound: 14
Spring: 660
Track Bar: 4.7
Rubber: YES
Drivetrain and Aero:
Gearing: Cog B
Brake Bias: 59
Steering Lock: 14
Aero
Tape: 100%
Front Splitter: 2.0
Front Bias: 50
Left Bias: 52
Wedge: Whatever it says
Front & Rear Sway Bar:
Front: 800
Rear: 400
-You've read my 3-part tutorial that explains the basics of NTG:IL Talladega Setups, right?
-If you haven't downloaded the patch yet, check out my 199 to 200 MPH Talladega Setup for that version of the game.
-If you have downloaded the patch, you've read how this is a preliminary attempt to strike a balance between raising the front ride height and how the car will want to bottom out, and now know how to adjust it to your liking, right?
This Talladega setup will bottom out and be loose. I race on the PS3 with a controller. If you have a wheel, reduce your steering lock.
Front Left:
Cold Pressure: 35
Camber: 8
Caster: 6
Front Right:
Cold Pressure: 65
Camber: -8
Caster: 6
Rear Left:
Pressure: 35
Camber: 1.8
Rear Right:
Pressure: 65
Camber: -1.8
Front Toe-In: -1/4
Left Rear Toe In: -1/4
Right Rear Toe In: 1/16
Suspension:
Front Left:
Ride Height: 10.0
Bump: 71
Rebound: 40
Spring: 350
Front Right:
Ride Height: 10.0
Bump: 71
Rebound: 19
Spring: 350
Rear Left:
Ride Height: 5.5
Bump: 69
Rebound: 14
Spring: 460
Trackbar: 4.7
Rubber: YES
Rear Right:
Ride Height: 5.6
Bump: 69
Rebound: 14
Spring: 660
Track Bar: 4.7
Rubber: YES
Drivetrain and Aero:
Gearing: Cog B
Brake Bias: 59
Steering Lock: 14
Aero
Tape: 100%
Front Splitter: 2.0
Front Bias: 50
Left Bias: 52
Wedge: Whatever it says
Front & Rear Sway Bar:
Front: 800
Rear: 400
NASCAR The Game: Inside Line - Talladega Setup Discussion For Patched Games
If you're completely clueless about where to start or even what I was talking about here, I first suggest you read my 3-part NASCAR The Game: Inside Line Talladega Setup Tutorial and then try plugging in my pre-patch NTG:IL Talladega Setup to get a basic feel for the problems described here. If you have read the tutorial, and have downloaded the patch, this covers the advantages you can gain in speed, and the problems you may encounter in handling at plate tracks.
After you have patched NASCAR The Game: Inside Line, you find that you can raise your front ride height from a maximum of 8 to a new max of 10 at Talladega. You can also lower the rear ride-height from 7.5 to 5.5. In combination, this change lets you easily get your car up to 202-203 MPH down the straights. Raising the front nose and lowering the rear lets you get that spoiler out of the air, and the patch lets you do that more than before.

Unfortunately, while this improves straight line speed, it severely worsens out the problem where the back end of your car bottoms out, sparks, and drags along the track. This causes your controller to want to rumble out of your hands, and can seriously compromise your car's handling at times. It's particularly bad in the corners.

There are tricks you can use to counteract this. You can stiffen the rear springs, increase the rear bump (this makes the shocks slow down the force of that part of the car pressing down into the track,) and reduce your rear rebound. (More rebound holds down that corner of the car for longer once it's been pressed into the track, so a lower number helps it bounce back faster, especially if it just hit the track.) Of course, adding too much to your springs will slow you down, as stiffening starts to push that spoiler back into the air.
Another option to combat the problem is to lower the springs in the front, but I generally advised you run them at the minimum (350 lbs) in the first place, so there's no way to soften them more. You can lower the bump in the front and increase the rebound. This will let your ridiculously raised nose press down more into the track in the corners. But if your bump is too low, the nose of the car goes down too early going into the corners, and you lose that last bit of speed. Similarly, if you raise your rebound too much, your shocks prevent the nose from coming back up for so long you lose way too much speed again.
The point is, from now on, if you want to run fast at Talladega, you can no longer avoid the compromise between pure speed down the straights, and ruining your handling in the corner as the back of your car drags along the track. You might be able to get your car up to 203 MPH in the straights, but that's worth nothing if you spin out every other turn, or slow down to 196 just to maintain control.
I'm still working on this compromise myself. I'll post two different setup configurations I have. They still bump and drag, so you may want to follow my above advice to make them more comfortable, even if they lose a little bit of speed.
After you have patched NASCAR The Game: Inside Line, you find that you can raise your front ride height from a maximum of 8 to a new max of 10 at Talladega. You can also lower the rear ride-height from 7.5 to 5.5. In combination, this change lets you easily get your car up to 202-203 MPH down the straights. Raising the front nose and lowering the rear lets you get that spoiler out of the air, and the patch lets you do that more than before.

It may look weird, but it's fast.
Unfortunately, while this improves straight line speed, it severely worsens out the problem where the back end of your car bottoms out, sparks, and drags along the track. This causes your controller to want to rumble out of your hands, and can seriously compromise your car's handling at times. It's particularly bad in the corners.

Bad like, "My car seems to think this 2.6 mile superspeedway is a dirt track."
.There are tricks you can use to counteract this. You can stiffen the rear springs, increase the rear bump (this makes the shocks slow down the force of that part of the car pressing down into the track,) and reduce your rear rebound. (More rebound holds down that corner of the car for longer once it's been pressed into the track, so a lower number helps it bounce back faster, especially if it just hit the track.) Of course, adding too much to your springs will slow you down, as stiffening starts to push that spoiler back into the air.
Another option to combat the problem is to lower the springs in the front, but I generally advised you run them at the minimum (350 lbs) in the first place, so there's no way to soften them more. You can lower the bump in the front and increase the rebound. This will let your ridiculously raised nose press down more into the track in the corners. But if your bump is too low, the nose of the car goes down too early going into the corners, and you lose that last bit of speed. Similarly, if you raise your rebound too much, your shocks prevent the nose from coming back up for so long you lose way too much speed again.
The point is, from now on, if you want to run fast at Talladega, you can no longer avoid the compromise between pure speed down the straights, and ruining your handling in the corner as the back of your car drags along the track. You might be able to get your car up to 203 MPH in the straights, but that's worth nothing if you spin out every other turn, or slow down to 196 just to maintain control.
I'm still working on this compromise myself. I'll post two different setup configurations I have. They still bump and drag, so you may want to follow my above advice to make them more comfortable, even if they lose a little bit of speed.
NASCAR The Game: Inside Line Talladega Setup Pre-Patch
Here's the short and sweet version of that I've been telling you in the tutorial for setting up your car to get to 199 MPH - 200 MPH at Talladega in NTG:IL. This is the pre-patch version. If you have not yet received the PS3 update for the game through the Internet, this is optimized for you. It should help you get to 199 MPH or so by yourself in practice on the straights, and give you a consistent lap time in the low 48 second range. For qualifying, it can give lap times in the high 47 second range, hitting 200 MPH at Talladega. It bottoms out a few times. If that bugs you, stiffen the rear springs 10-50 lbs in the rear, particularly on the right rear. If you want to use it for Daytona, stiffening the springs 40-100 LBS in the rear will help.
Even if you have patched, I've found this setup handles really well in the draft at Talladega. I once got a lag-push bump draft all the way up to 219 MPH down the back stretch and the setup was stable enough to save it.
Note: I developed this setup for the PS3 with a controller. If you have a wheel, it may need tweaks (particularly with lowering the steering lock.)
Important:
Start with the Michigan qualifying setup. In the infield garage, go to tuning, load the preset Michigan qualifying setup, edit it it how I have it below, and save it for Talladega.
Tires
Front Left:
Cold Pressure: 35
Camber: 8
Caster: 6
Front Right:
Cold Pressure: 65
Camber: -8
Caster: 6
Rear Left:
Pressure: 35
Camber: 1.8
Rear Right:
Pressure: 65
Camber: -1.8
Front Toe-In: -1/4
Left Rear Toe In: -1/4
Right Rear Toe In: 1/16 (If unpatched, this may be -1/4 and unchangeable. Don't worry too much about it.)
Suspension
Front Left:
Ride Height: 8.0
Bump: 71
Rebound: 40
Spring: 350
Front Right:
Ride Height: 8.0
Bump: 71
Rebound: 19
Spring: 380
Rear Left:
Ride Height: 7.5
Bump: 42
Rebound: 18
Spring: 240
Trackbar: 4.7 (If unpatched, you get this by starting with the Michigan Qualifying setup.)
Rubber: NO
Rear Right:
Ride Height: 7.5
Bump: 69
Rebound: 14
Spring: 310
Track Bar: 4.7 (If unpatched, you get this by starting with the Michigan Qualifying setup.)
Rubber: NO
Drivetrain & Aero
Gearing: Cog B
Brake Bias: 59
Steering Lock: 14
Tape: 100%
Front Splitter: 2.0
Balance
Front Bias: 50
Left Bias: 52
Wedge: Whatever it says -- don't bother touching it.
Front & Rear Sway Bar:
Front: 800
Rear: 400
Even if you have patched, I've found this setup handles really well in the draft at Talladega. I once got a lag-push bump draft all the way up to 219 MPH down the back stretch and the setup was stable enough to save it.
Note: I developed this setup for the PS3 with a controller. If you have a wheel, it may need tweaks (particularly with lowering the steering lock.)
Important:
Start with the Michigan qualifying setup. In the infield garage, go to tuning, load the preset Michigan qualifying setup, edit it it how I have it below, and save it for Talladega.
Tires
Front Left:
Cold Pressure: 35
Camber: 8
Caster: 6
Front Right:
Cold Pressure: 65
Camber: -8
Caster: 6
Rear Left:
Pressure: 35
Camber: 1.8
Rear Right:
Pressure: 65
Camber: -1.8
Front Toe-In: -1/4
Left Rear Toe In: -1/4
Right Rear Toe In: 1/16 (If unpatched, this may be -1/4 and unchangeable. Don't worry too much about it.)
Suspension
Front Left:
Ride Height: 8.0
Bump: 71
Rebound: 40
Spring: 350
Front Right:
Ride Height: 8.0
Bump: 71
Rebound: 19
Spring: 380
Rear Left:
Ride Height: 7.5
Bump: 42
Rebound: 18
Spring: 240
Trackbar: 4.7 (If unpatched, you get this by starting with the Michigan Qualifying setup.)
Rubber: NO
Rear Right:
Ride Height: 7.5
Bump: 69
Rebound: 14
Spring: 310
Track Bar: 4.7 (If unpatched, you get this by starting with the Michigan Qualifying setup.)
Rubber: NO
Drivetrain & Aero
Gearing: Cog B
Brake Bias: 59
Steering Lock: 14
Tape: 100%
Front Splitter: 2.0
Balance
Front Bias: 50
Left Bias: 52
Wedge: Whatever it says -- don't bother touching it.
Front & Rear Sway Bar:
Front: 800
Rear: 400
NASCAR The Game: Inside Line Talladega Setup Tutorial - Part 3
Talladega Setup for NASCAR The Game: Inside Line - Tutorial Part 1
Talladega Setup for NASCAR The Game: Inside Line - Tutorial Part 2
Springs and Shocks:
You've dealt with the Michigan Setup at Talladega issue in NTG:IL. You've got the basics of aero, tires, springs, and more down. Now it's time to get down to the nitty gritty details of refining your shocks and springs so you can get to 200 MPH by yourself at Talladega.
You softened your springs to 350 lbs all around to help your car push into the track better, but this is not perfect. In default, the front springs were stiffer than the rear, keeping the nose up and the spoiler out of the air. We made the car faster by softening them overall, but we undid some of the gains caused by raising the front ride height and lowering the rear in the process. So now we want to get that back by further lowering the rear springs as much as we can get away with before the back of the car car is constantly sparking and dragging in the corners.
This gets complicated because once you get this close to the line between super-fast and out of control, you also have to take into consideration the "bump" and "rebound" of the shocks.
The "bump" slows down how quickly a corner the car presses down into the track going in to corners, and the "rebound" slows down how quickly that corner raises back up as you come out of the corner. So when you're softening up your springs, adding bump can help stop your car from bottoming out, and reducing rebound can help make sure it doesn't drag for a long distance if a part of the car does hit.
My personal pre-patch setup for shocks and springs went like this:
Front left:
Springs: 350
Bump: 71
Rebound: 40
Front Right:
Springs: 380
Bump: 71
Rebound: 19
Left Rear:
Springs: 230
Bump: 42
Rebound: 18
Right Rear:
Springs: 300
Bump: 69
Rebound: 14
A few notes - If you are running a post-patch setup, you're going to want to add a few hundred pounds to those rear springs, and pump up the bump on the rear shocks. For my pre-patch setup, the bump was so high in the front to keep that front end sticking in the air longer as I enter the corner. The front left rebound was higher because I found it helped me get off the corner better.
Even pre-patch, with your ride-heights at 8.5 in the front and 7.5 in the rear, this setup sparks and bottoms out in the corners a few times. I didn't mind this. If it bugs you, lower the bump in the front and/or add about 30 pounds to each side for the rear springs. It's a bit slower, but more stable.
When I figure out a good shock and spring package post-patch, I'll be sure to share it here... once I rack up a few wins online, of course ;)
Talladega Setup for NASCAR The Game: Inside Line - Tutorial Part 2
Springs and Shocks:
You've dealt with the Michigan Setup at Talladega issue in NTG:IL. You've got the basics of aero, tires, springs, and more down. Now it's time to get down to the nitty gritty details of refining your shocks and springs so you can get to 200 MPH by yourself at Talladega.
You softened your springs to 350 lbs all around to help your car push into the track better, but this is not perfect. In default, the front springs were stiffer than the rear, keeping the nose up and the spoiler out of the air. We made the car faster by softening them overall, but we undid some of the gains caused by raising the front ride height and lowering the rear in the process. So now we want to get that back by further lowering the rear springs as much as we can get away with before the back of the car car is constantly sparking and dragging in the corners.
This gets complicated because once you get this close to the line between super-fast and out of control, you also have to take into consideration the "bump" and "rebound" of the shocks.
The "bump" slows down how quickly a corner the car presses down into the track going in to corners, and the "rebound" slows down how quickly that corner raises back up as you come out of the corner. So when you're softening up your springs, adding bump can help stop your car from bottoming out, and reducing rebound can help make sure it doesn't drag for a long distance if a part of the car does hit.
My personal pre-patch setup for shocks and springs went like this:
Front left:
Springs: 350
Bump: 71
Rebound: 40
Front Right:
Springs: 380
Bump: 71
Rebound: 19
Left Rear:
Springs: 230
Bump: 42
Rebound: 18
Right Rear:
Springs: 300
Bump: 69
Rebound: 14
A few notes - If you are running a post-patch setup, you're going to want to add a few hundred pounds to those rear springs, and pump up the bump on the rear shocks. For my pre-patch setup, the bump was so high in the front to keep that front end sticking in the air longer as I enter the corner. The front left rebound was higher because I found it helped me get off the corner better.
Even pre-patch, with your ride-heights at 8.5 in the front and 7.5 in the rear, this setup sparks and bottoms out in the corners a few times. I didn't mind this. If it bugs you, lower the bump in the front and/or add about 30 pounds to each side for the rear springs. It's a bit slower, but more stable.
When I figure out a good shock and spring package post-patch, I'll be sure to share it here... once I rack up a few wins online, of course ;)
Talladega Setup For NASCAR The Game: Inside Line Tutorial - Part 2
NASCAR Talladega Inside Line Setup Tutorial Part 1 here...
NASCAR Talladega Inside Line Setup Tutorial Part 3 here...
If you followed along in part 1, you may notice that your car now "hits" the track once or twice in the corner, slightly bottoming out. From here on out it's a battle to get that rear as low to the ground possible without it "dragging" so much that you lose speed or ruin the handling of your car. With that in mind:
Reduce That Front Sway Bar
When your car turns into a corner, the physics acting on the car want to make it roll over. This raises the left side of the car and lowers the right. The Sway bar is designed to counteract these forces in the car. In the default setup, your nose is to the ground, so you need a big front sway bar to keep the right front from "rolling over" and digging into the track. The downside is this tightens up your car and slows it in the corners.
But remember! You raised the front ride height on your car, so the nose isn't in as much danger of scraping on the right front. That means you can get away with less front sway bar. I suggest reducing it from 3000 lbs to 1000 lbs to start.
Add Some Rear Sway Bar
For the same reason you can get away with less front sway bar, you need a bit to help reduce this body roll in your now-lower rear. I suggest going to somewhere between 200-400 lbs to start. You don't want too much, otherwise your car will get crazy-loose in the corners.
Note: For the record, I personally run 800 lbs front sway bar, 400 lbs rear sway bar.
Soften Those Springs
This is probably the biggest change left, and that's because you start getting into the danger zone for dragging that rear end (particularly the right rear) on the track. But there's too much speed to be gained to leave it be. So let's take it nice and easy:
Start off by reducing your springs to 350 lbs all around. This is actually the lowest you can go in the front, but you can go lower in the rear (down to 200.) We will deal with that soon. But first:
Deal With the "Michigan setup for Talladega" Issue
Before the patch, there were definite setup glitches. If you altered your wedge, trackbar, or toe adjustments in NASCAR The Game: Inside Line, they would automatically revert or change after each race. Every time you went back in to make a change to your setup, it'd be different. These are all important tools for adjusting your car, so people found a workaround.
If you've talked with people online, they would tell you to load up the Michigan Qualifying Setup, and then change the car to suit Daytona/Talladega racing. Here's why:
First, the default Talladega setup has the trackbar set at 8.0. Michigan has it saved at 4.7. So if you start with this setup, you get a lower trackbar, which makes your car more stable through the turns after you've applied all these changes. Now that the game is patched, you can just lower the trackbar on your own to 4.7 and it will stay.
Second, the default Talladega setup has a -1/4 toe in the front and for both rear tires. The "toe" of the car is the angle the tires are set when looking down on the car. For a good example of what this means, look down at your own feet. You can turn your toes inward towards each other (negative toe) or outwards to face away from each other (positive toe.) There's a slight difference between the Talladega default and the Michigan setup in the right rear. For 'dega, the Toe is turned in -1/4, for Michigan, it's turned out 1/16. The Michigan RR Toe is faster. If the game is patched, set your RR toe to 1/16. Leave the rest at -1/4.
These two changes are things you can't adjust if your game is unpatched, but now that the update has been released, you can do them yourself without it screwing up.
Michigan also has better shock settings (bump and rebound) than the default Talladega/Daytona settings, which will give you more speed initially, until we get around to messing with them, or if you choose not to touch them.
There are also superficial changes you may or may not like if you use the Michigan setup, that won't glitch out if you adjust them manually even with an unpatched game. The Michigan steering lock is 14 degrees, Talladega is 13. You can find whichever range you like better. More steering lock will let you turn the car tighter, but make it twitcher. Less steering lock is more stable, but once you have your wheel/joystick cranked all the way, that's it.
The default Talladega setup has brake bias set at 65, Michigan is at 56. You can change this without it glitching out even in a version of NTG:IL that hasn't been updated, but it doesn't really matter at plate tracks, since you don't brake unless making a green flag pit stop. A higher number will make you slow down quicker.
Continued in the NTG:IL Talladega Setup Tutorial Part 3...
NASCAR Talladega Inside Line Setup Tutorial Part 3 here...
If you followed along in part 1, you may notice that your car now "hits" the track once or twice in the corner, slightly bottoming out. From here on out it's a battle to get that rear as low to the ground possible without it "dragging" so much that you lose speed or ruin the handling of your car. With that in mind:
Reduce That Front Sway Bar
When your car turns into a corner, the physics acting on the car want to make it roll over. This raises the left side of the car and lowers the right. The Sway bar is designed to counteract these forces in the car. In the default setup, your nose is to the ground, so you need a big front sway bar to keep the right front from "rolling over" and digging into the track. The downside is this tightens up your car and slows it in the corners.
But remember! You raised the front ride height on your car, so the nose isn't in as much danger of scraping on the right front. That means you can get away with less front sway bar. I suggest reducing it from 3000 lbs to 1000 lbs to start.
Add Some Rear Sway Bar
For the same reason you can get away with less front sway bar, you need a bit to help reduce this body roll in your now-lower rear. I suggest going to somewhere between 200-400 lbs to start. You don't want too much, otherwise your car will get crazy-loose in the corners.
Note: For the record, I personally run 800 lbs front sway bar, 400 lbs rear sway bar.
Soften Those Springs
This is probably the biggest change left, and that's because you start getting into the danger zone for dragging that rear end (particularly the right rear) on the track. But there's too much speed to be gained to leave it be. So let's take it nice and easy:
Start off by reducing your springs to 350 lbs all around. This is actually the lowest you can go in the front, but you can go lower in the rear (down to 200.) We will deal with that soon. But first:
Deal With the "Michigan setup for Talladega" Issue
Before the patch, there were definite setup glitches. If you altered your wedge, trackbar, or toe adjustments in NASCAR The Game: Inside Line, they would automatically revert or change after each race. Every time you went back in to make a change to your setup, it'd be different. These are all important tools for adjusting your car, so people found a workaround.
If you've talked with people online, they would tell you to load up the Michigan Qualifying Setup, and then change the car to suit Daytona/Talladega racing. Here's why:
First, the default Talladega setup has the trackbar set at 8.0. Michigan has it saved at 4.7. So if you start with this setup, you get a lower trackbar, which makes your car more stable through the turns after you've applied all these changes. Now that the game is patched, you can just lower the trackbar on your own to 4.7 and it will stay.
Second, the default Talladega setup has a -1/4 toe in the front and for both rear tires. The "toe" of the car is the angle the tires are set when looking down on the car. For a good example of what this means, look down at your own feet. You can turn your toes inward towards each other (negative toe) or outwards to face away from each other (positive toe.) There's a slight difference between the Talladega default and the Michigan setup in the right rear. For 'dega, the Toe is turned in -1/4, for Michigan, it's turned out 1/16. The Michigan RR Toe is faster. If the game is patched, set your RR toe to 1/16. Leave the rest at -1/4.
These two changes are things you can't adjust if your game is unpatched, but now that the update has been released, you can do them yourself without it screwing up.
Michigan also has better shock settings (bump and rebound) than the default Talladega/Daytona settings, which will give you more speed initially, until we get around to messing with them, or if you choose not to touch them.
There are also superficial changes you may or may not like if you use the Michigan setup, that won't glitch out if you adjust them manually even with an unpatched game. The Michigan steering lock is 14 degrees, Talladega is 13. You can find whichever range you like better. More steering lock will let you turn the car tighter, but make it twitcher. Less steering lock is more stable, but once you have your wheel/joystick cranked all the way, that's it.
The default Talladega setup has brake bias set at 65, Michigan is at 56. You can change this without it glitching out even in a version of NTG:IL that hasn't been updated, but it doesn't really matter at plate tracks, since you don't brake unless making a green flag pit stop. A higher number will make you slow down quicker.
Continued in the NTG:IL Talladega Setup Tutorial Part 3...
NASCAR The Game: Inside Line Talladega Setup Tutorial - Part 1
Talladega Setup for NASCAR The Game: Inside Line - Tutorial Part 2
Talladega Setup for NASCAR The Game: Inside Line - Tutorial Part 3
Note 1: This tutorial is mostly from what I learned pre-patch. A lot of the principles still apply, but I will include certain updates as I figure them out
Note 2: I play the PS3 version of the game, and race with a controller. If you're on X-Box360 and/or use a wheel, you may need to tweak things.
Note 3: These changes help whether you start with the default Talladega Setup, or choose to load the Michigan Qualifying setup and start making changes. I prefer to start with the Michigan Qualifying setup.
To do so: Go to tuning, then to Apply Setup, Select Michigan as the track, then Setup Type: Preset Michigan.
I will discuss why this helps later.
Intro: Why does it matter if you run a setup for Talladega or a setup for Daytona? Shouldn't you just be able to run in the draft and keep up with people? Ideally, yes, but then the game gives you a glitchy strung-out restart, or you have to slam on the brakes to avoid an incident, and the next thing you know you're losing the draft. When you race online, you find two guys are able to just drive away from you because their cars are that much faster. I have a simple rule of thumb: the faster your car is on its own at the plate tracks, the more options you have in the race.
I will provide a shorter version later, but I think explaining *why* I make certain changes will let you build your own Talladega setup for NTG:IL.
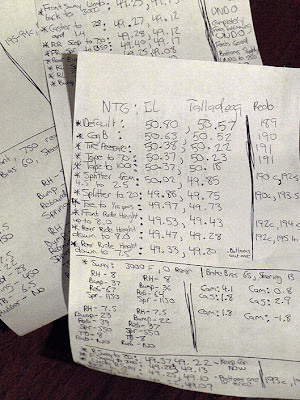
Go to single player, select track testing. Do your work from here -- this will provide you with the best baseline for the performance of your car. Alternately you can go online and make a private practice lobby. When testing, I usually make runs like in qualifying - one warmup lap from the pits, then two hot laps. This helps you get a good feel for what your car can do with each change. I'm going to give you changes that make the biggest difference first, then provide tweaks as things go.
Turn off your assists.
They limit the potential of your car, deaden the way it handles, and I've noticed at Daytona the car will randomly hit the auto-brake, even though you should be running flat out.
Pump up those tire pressures.
35 on the lefts, 65 on the right. This reduces rolling friction and is one of the biggest things you can do to immediately make your car faster.
Tape up the grill.
If you're going to be running a lot of short shootouts online, go ahead and tape it up to 100%. This reduces drag, and gives you another big top speed boost.
Shorten up the splitter
The front splitter provides downforce, but it also creates drag. These tracks are flat-out with wide sweeping corners. You don't need the 4.5 inches the game gives you. Shorten it all the way to 2.0 to get another aero improvement to help your speed.
By now you should be solidly breaking into the high 49 second lap times if you're following along step by step.
Change Gears
The game offers you two basic choices for gearing. Cog A and Cog B. The game tells you A provides higher top speed when you max out the engine, B provides quicker acceleration. But keep in mind these are plate tracks. You never max out those revs, so while it may seem you want to choose "top speed," you'll actually get to a higher speed by choosing Cog B. So change from Cog A to Cog B for now.
Note: I've noticed Cog B has a tendency to makes "bottoming out" a bit worse, so some people prefer Cog A for driving comfort. Others argue Cog A works better when you get crazy 210 MPH drafts going online.
Change the Ride Heights
An old trick from NTG2011 was to raise the ride heights on the front all the way, and lower them in the back all the way. This means 8 in the front, 7.5 in the back. This gives your car a lot of speed on the straights. The general idea is that by raising the nose and lowering the rear, you get that rear spoiler out of the air, reducing aero drag.
Note 1: This is not unprecedented in real life NASCAR. Watch qualifying for the 1999 Daytona 500 on Youtube. See now most of the cars run down the straight with their noses stuck up and the ass end of the car almost dragging the ground:
https://www.youtube.com/watch?feature=player_detailpage&v=iSEWpVhx1wc#t=5760s
Note 2: After downloading the patch, the game allows you to raise the front to 10 and the rear to 5.5. Taking it to these further limits will help your car go even faster, but will make it much, much harder to prevent the back end of your car from dragging. If you have a patched version of the game and decide to try this, run much harder rear springs than I recommend later in this tutorial. I'm talking about adding 3-400 LBS to each side. If you are currently trying to follow along and learn, put them at 8.5 in the front and 7.5 in the rear until you reach the end of this tutorial. Then you can go back!
Adjust Your Camber
Positive camber is where the top of the tire tilts away from the body of the car, and the bottom of the tire is tilted in. Negative camber is where the bottom of the tire is tilted out, and the top is tilted in. Talladega and Daytona are high banked tracks, so if you tilt the tires to match that banking, you get more grip in the corners, which will help you maintain more speed in them and handle better.
So with that in mind, I run the maximum positive camber in the left tires, and the most negative camber I can in the right. That's +8 on the FL, and -8 on the FR.

Note 1: Your rear camber should already be maxed out at 1.8 and -1.8 by default.
Note 2: Running lots of camber means your tires are on their edges down unbanked straights. This will make them wear out faster at most other tracks, but I haven't noticed a problem at Daytona or Talladega
Max Out Your Caster
Caster has to do with the way the wheel is hooked up. All you need to know is that more caster makes your car want to turn more the longer you hold that joystick/steering wheel to the left. I max it out on both sides. +6 and +6. This really helps the car maintain more of the speed you otherwise tend to lose in the middle and exit of the corners.
For those of you following along step by step, this is where I hit the 49.00 second mark at 'dega if I'm starting from the Talladega default.
Continued In: NTG:IL Talladega Setup Tutorial Part 2...
Talladega Setup for NASCAR The Game: Inside Line - Tutorial Part 3
Note 1: This tutorial is mostly from what I learned pre-patch. A lot of the principles still apply, but I will include certain updates as I figure them out
Note 2: I play the PS3 version of the game, and race with a controller. If you're on X-Box360 and/or use a wheel, you may need to tweak things.
Note 3: These changes help whether you start with the default Talladega Setup, or choose to load the Michigan Qualifying setup and start making changes. I prefer to start with the Michigan Qualifying setup.
To do so: Go to tuning, then to Apply Setup, Select Michigan as the track, then Setup Type: Preset Michigan.
I will discuss why this helps later.
Intro: Why does it matter if you run a setup for Talladega or a setup for Daytona? Shouldn't you just be able to run in the draft and keep up with people? Ideally, yes, but then the game gives you a glitchy strung-out restart, or you have to slam on the brakes to avoid an incident, and the next thing you know you're losing the draft. When you race online, you find two guys are able to just drive away from you because their cars are that much faster. I have a simple rule of thumb: the faster your car is on its own at the plate tracks, the more options you have in the race.
I will provide a shorter version later, but I think explaining *why* I make certain changes will let you build your own Talladega setup for NTG:IL.

In some cases, I reserve the right to throw my hands up and say, "because it made me go faster."
Go to single player, select track testing. Do your work from here -- this will provide you with the best baseline for the performance of your car. Alternately you can go online and make a private practice lobby. When testing, I usually make runs like in qualifying - one warmup lap from the pits, then two hot laps. This helps you get a good feel for what your car can do with each change. I'm going to give you changes that make the biggest difference first, then provide tweaks as things go.
Turn off your assists.
They limit the potential of your car, deaden the way it handles, and I've noticed at Daytona the car will randomly hit the auto-brake, even though you should be running flat out.
Pump up those tire pressures.
35 on the lefts, 65 on the right. This reduces rolling friction and is one of the biggest things you can do to immediately make your car faster.
Tape up the grill.
If you're going to be running a lot of short shootouts online, go ahead and tape it up to 100%. This reduces drag, and gives you another big top speed boost.
Shorten up the splitter
The front splitter provides downforce, but it also creates drag. These tracks are flat-out with wide sweeping corners. You don't need the 4.5 inches the game gives you. Shorten it all the way to 2.0 to get another aero improvement to help your speed.
By now you should be solidly breaking into the high 49 second lap times if you're following along step by step.
Change Gears
The game offers you two basic choices for gearing. Cog A and Cog B. The game tells you A provides higher top speed when you max out the engine, B provides quicker acceleration. But keep in mind these are plate tracks. You never max out those revs, so while it may seem you want to choose "top speed," you'll actually get to a higher speed by choosing Cog B. So change from Cog A to Cog B for now.
Note: I've noticed Cog B has a tendency to makes "bottoming out" a bit worse, so some people prefer Cog A for driving comfort. Others argue Cog A works better when you get crazy 210 MPH drafts going online.
Change the Ride Heights
An old trick from NTG2011 was to raise the ride heights on the front all the way, and lower them in the back all the way. This means 8 in the front, 7.5 in the back. This gives your car a lot of speed on the straights. The general idea is that by raising the nose and lowering the rear, you get that rear spoiler out of the air, reducing aero drag.
Note 1: This is not unprecedented in real life NASCAR. Watch qualifying for the 1999 Daytona 500 on Youtube. See now most of the cars run down the straight with their noses stuck up and the ass end of the car almost dragging the ground:
https://www.youtube.com/watch?feature=player_detailpage&v=iSEWpVhx1wc#t=5760s
Note 2: After downloading the patch, the game allows you to raise the front to 10 and the rear to 5.5. Taking it to these further limits will help your car go even faster, but will make it much, much harder to prevent the back end of your car from dragging. If you have a patched version of the game and decide to try this, run much harder rear springs than I recommend later in this tutorial. I'm talking about adding 3-400 LBS to each side. If you are currently trying to follow along and learn, put them at 8.5 in the front and 7.5 in the rear until you reach the end of this tutorial. Then you can go back!
Adjust Your Camber
Positive camber is where the top of the tire tilts away from the body of the car, and the bottom of the tire is tilted in. Negative camber is where the bottom of the tire is tilted out, and the top is tilted in. Talladega and Daytona are high banked tracks, so if you tilt the tires to match that banking, you get more grip in the corners, which will help you maintain more speed in them and handle better.
So with that in mind, I run the maximum positive camber in the left tires, and the most negative camber I can in the right. That's +8 on the FL, and -8 on the FR.

Camber
Note 1: Your rear camber should already be maxed out at 1.8 and -1.8 by default.
Note 2: Running lots of camber means your tires are on their edges down unbanked straights. This will make them wear out faster at most other tracks, but I haven't noticed a problem at Daytona or Talladega
Max Out Your Caster
Caster has to do with the way the wheel is hooked up. All you need to know is that more caster makes your car want to turn more the longer you hold that joystick/steering wheel to the left. I max it out on both sides. +6 and +6. This really helps the car maintain more of the speed you otherwise tend to lose in the middle and exit of the corners.
For those of you following along step by step, this is where I hit the 49.00 second mark at 'dega if I'm starting from the Talladega default.
Continued In: NTG:IL Talladega Setup Tutorial Part 2...
Subscribe to:
Posts (Atom)